Prepare Your Flex Block Storage Volume
Previous section: Create and Attach a Flex Block Storage Volume
After you have created and attached your Flex Block Storage volume, you must prepare it for use on your server. To prepare the volume, you must partition, format, and mount it. After you have completed these steps, your volume is usable like a drive on your server.
Prepare your volume for use with a Linux server
Connect to your server via SSH
Using SSH, log in to the server using your SSH key and the default non-privileged user for your image (e.g. ubuntu, debian, centos). You can find the server's IP address in the Skyline portal under Compute > Instances.
Use sudo to run commands that require root privileges.
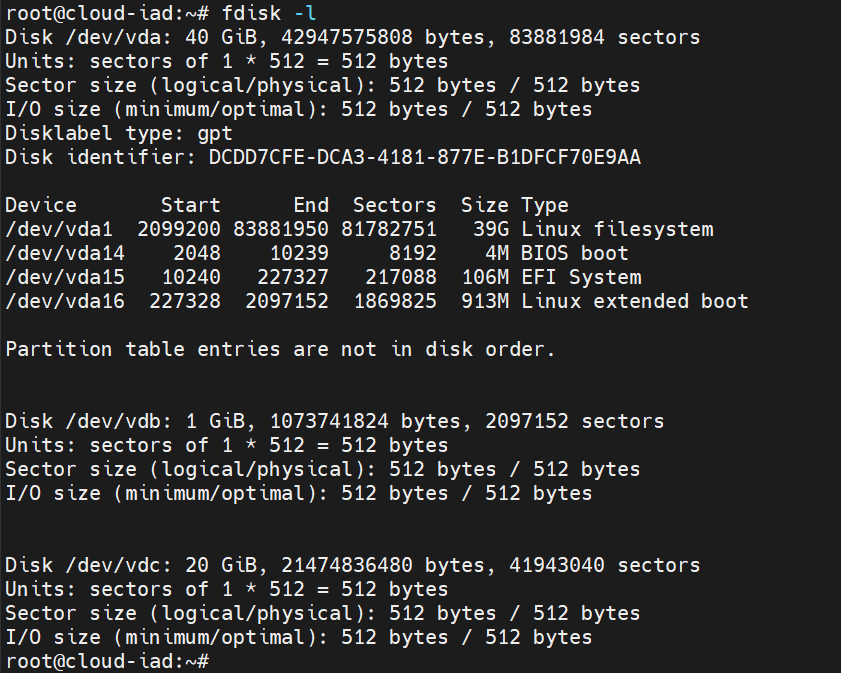
After you log in, list the disks on your server. Your volume typically displays as the last drive in this list. In the following example, the 20 GB volume is attached to /dev/vdc.
Partition the disk
Partitioning the disk tells the server how much space on the drive you want to use. To use all of it, tell the server to start at the first cylinder and go to the last.
-
Run the
fdiskutility and specify the disk: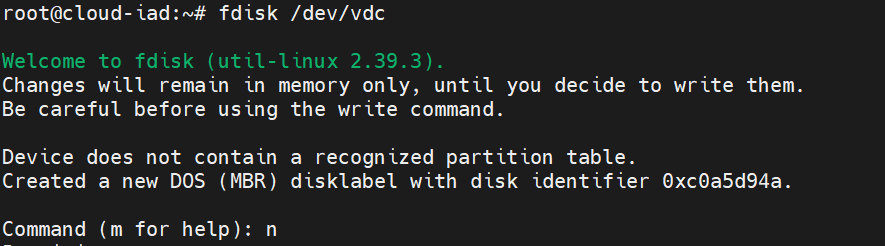
-
Enter
nto create a new partition. -
Enter
pto indicate a primary partition. -
Enter
1to create only one partition on this disk.
-
Press Enter to accept the default start cylinder.

-
Press Enter to accept the default end cylinder (uses the entire volume).
-
Enter
wto write the partition table and exit.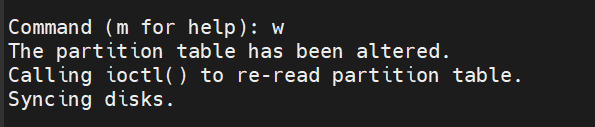
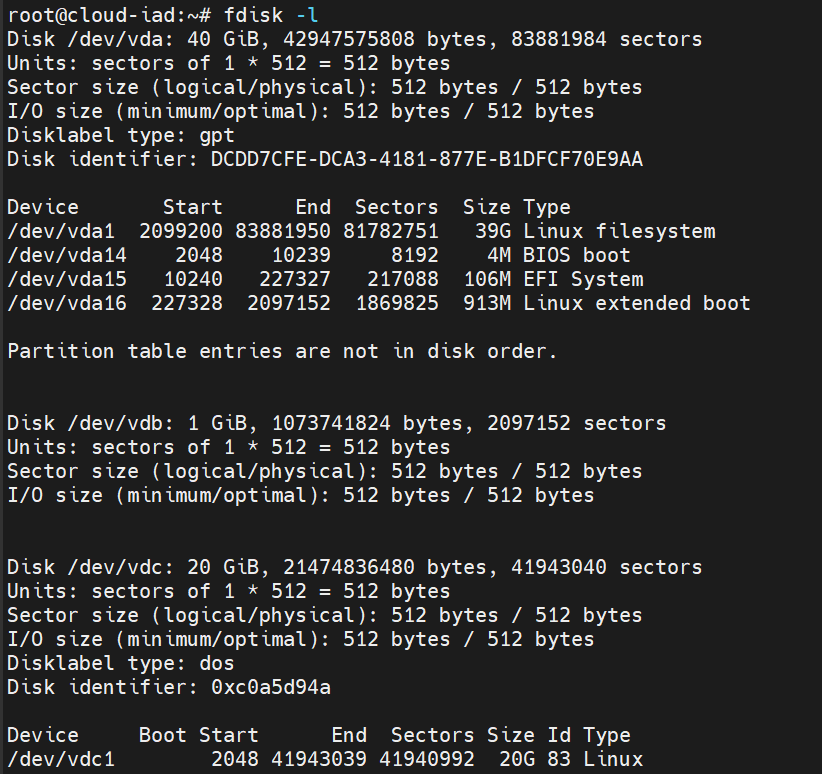
After writing, list the disks again to confirm. Your partition now appears as /dev/vdc1.
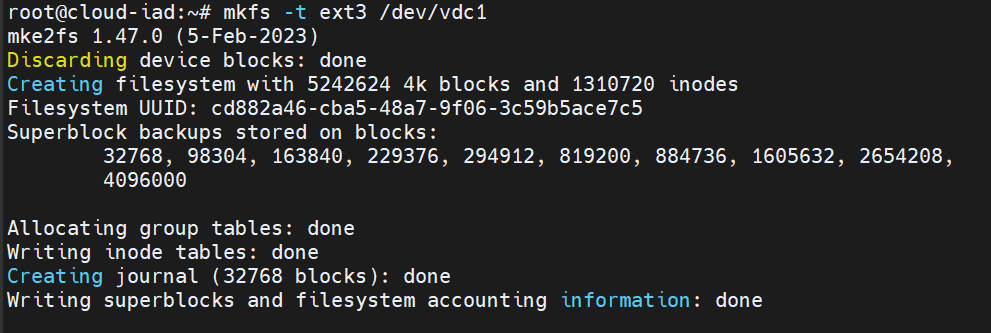
Format the volume
Formatting the volume enables the server to store information on it. The following example uses ext3. You can use other file systems supported by your kernel.
Mount the volume
After partitioning and formatting the volume, you must mount it on the server.
-
Create a mount point and mount the volume:

-
Verify the volume is mounted by checking free disk space:
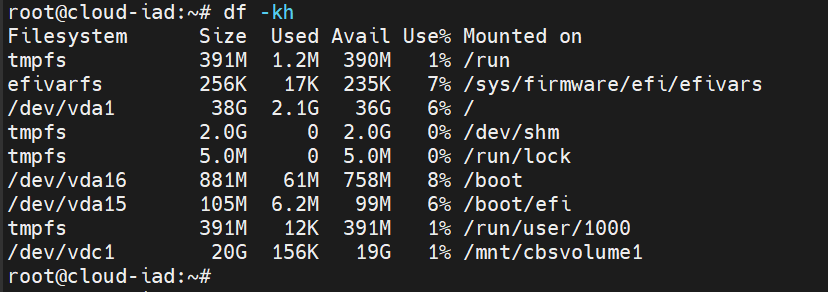
Your new volume should appear in the list of available drives.
Note
If you ever decide to move the volume to a different server, unmount the volume first using the umount command, then detach it via Skyline and re-attach it to the new server.
Make the volume persistent after reboot
This step is optional but recommended. It keeps your volume mounted automatically after server restarts.
Add your volume to /etc/fstab:


Note
The _netdev option prevents attempts to mount the volume until all networking is running. The nofail option allows the server to boot even if the volume is unavailable.